How to choose the best HID grow light?

So you’re ready to get a MH/HPS grow light? Perhaps you want to upgrade to an MH/HPS light from your existing setup, or maybe this could be your very first grow light for growing cannabis.

What is HID grow lights?

MH/HPS is a great choice for growing cannabis! This type of grow light has been the “golden standard” of indoor growing for decades because they work so well at delivering fast growth, big yields and dense, potent buds! They are easy to use and there’s an abundance of information, guidance and other types of help for MH/HPS growers.

MH grow lights stands for “Metal Halide” and HPS stands for “High Pressure Sodium.” These are two specialized types of bulbs that are great for growing plants, from a class of lights known as HID Grow Lights (High Intensity Discharge).

MH grow lights appear blue and are often used in the cannabis plant’s vegetative stage (first stage of life). HPS lights appear yellow and are often used for the flowering stage (second stage of life). Either type of bulb can be used for the entire cannabis plant’s life span, but HPS grow lights are better for the flowering stage. Many grow light ballasts allow you to use both MH and HPS in the same hood/reflector – just take one bulb out and plug in the other bulb – you’re good to go!

These lights are bright! While MH bulbs give off blue light, HPS bulbs like this one give off bright yellow light, which happens to be perfect to get plants to grow buds during the flowering stage.

Do I Need HPS or MH Grow Bulbs?

The short answer: get both!

High Pressure Sodium (HPS) bulbs emit a yellow-orange-red light, which is ideal for maximizing yields during the flowering cycle, but results in weaker plants if used during vegging.

Metal Halide (MH) bulbs emit a bluer light that makes for strong plant growth during vegging, but produces lower yields during flowering.

It is possible to use either of these bulbs on their own throughout the full grow cycle, but your results will be better if you combine the two.

Here are the different options, from best to worst:

BEST RESULTS: use MH and HPS bulbs at the same time

Plants grow best when they get both red and blue spectrum light through all growth stages.

That said, for most growers, we would not recommend this, as the cost increase does not justify the slightly better yields.

If you do want to run both bulbs, we recommend using HPS bubs overhead as the primary light source and supplementing them with MH bulbs (or blue-spectrum fluorescent bulbs) hanging naked (without a reflector) between the plants.

Alternatively, you could use MH bulbs as the primary lighting throughout the grow and add in HPS light during flowering to boost yields. This would be a bit cheaper to run, but plants would grow faster and stronger with the previous method.

GREAT RESULTS: use MH during vegging and HPS during flowering

This is the most popular combination, because modern digital ballasts allow you to use the same reflector and ballast to run both HPS and MH bulbs. All you have to do is switch out the bulb and keep growing.

This is what we recommend. And luckily, almost all grow light kits are available with both an MH and an HPS bulb.

DECENT RESULTS: Use only HPS bulbs throughout the grow

If you’re going to use only one bulb for the whoe grow cycle, HPS bulbs are better. They might not be great during veg, but they produce by far the best yields during flowering.

WORST OPTION: Use only MH bulbs throughout the grow

Using metal halide bulbs during flowering will not result in great yields, making this the worst option.

Wattage

We’ll try to limit this subchapter to 250 watts and 1000 watts since outside of that range is certainly inefficient to be used in indoor growing.

For average growers, you must use 400-600 watt bulbs because 1000 watts is quite hot. Though of course, you can pick this amount of wattage if you can manage the heat it produces.

But what I really want you to do is to use several fewer watt bulbs than picking up those with high wattage because it is more efficient.

  • Use 250 watts for 3-5 plants and distance them from the Canopy 6 inches to 8 inches.
  • Use 400 watts for 6-9 plants and distance them from the Canopy 9 inches to 12 inches.
  • Use 600 watts for 9-12 plants and distance them from the Canopy 12 inches to 18 inches.
  • Use 1000 watts for 12-16 + plants and distance them from the Canopy 18 inches to 26 inches.

What HPS Reflector Style Is Best?

This depends on your needs. We’ll cover the pros and cons of each HPS reflectors type below. That should help you choose the best one.

Wing Reflector
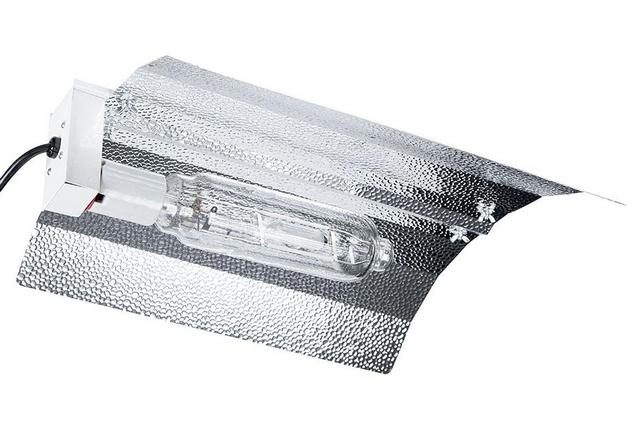
ipower wing reflector

Pros

  • the cheapest reflector
  • largest coverage
  • no glass to refract any of the light
  • no ducting needs to be run through light fixture

Cons

  • all the heat from the bulb goes into the grow room
  • front and back ends are open, so some light escapes and is not directed onto plants

Who is it for?

  • growers on a budget
  • large grow rooms (10+) lights where ducting makes no sense
  • growers who want to ventilate the whole room and not each individual light

Cool Hood Reflector

ipower cool hood reflector

Pros

  • can hang closer to plants
  • focused light penetrates deeper below canopy
  • heat from bulbs never enters grow space

Cons

  • focused light means smaller coverage (about 4×4 feet)
  • the glass cover refracts a small amount of light
  • need to run ducting to fixture

Who is it for?

  • small to medium sized grows in enclosed spaces (like a tent)
  • growers who want to vent out the heat before it enters the room

Cool Tube Reflector
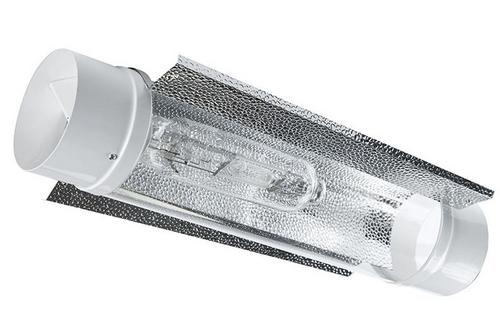
ipower cool tube reflector

Pros

  • the cheapest air cooled reflector
  • great for hanging vertically

Cons

  • small reflector surface allows a lot of light to escape
  • the glass cover refracts a small amount of light
  • need to run ducting to fixture

Who is it for?

  • growers who want to hang lights vertically
  • growers on a strict budget who want an air cooled light

Cool Tube Hood Reflector
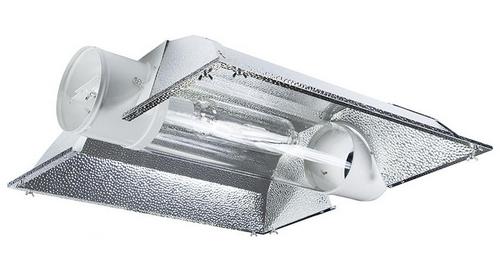
ipower cool tube hood reflector

Pros

  • large coverage (especially the XXL version)
  • keeps heat from bulb out of grow room

Cons

  • most expensive reflector (especially the XXL version)
  • less focused light (due to larger spread)
  • the glass cover refracts a small amount of light
  • need to run ducting to fixture

Who is it for?

  • growers who need a larger coverage area per light
  • growers who want to vent out the heat before it enters the room

Umbrella Reflectors

umbrella reflector

Pros

  • very large coverage area
  • even light distribution

Cons

  • very low intensity and penetration
  • not air-cooled (again, only a con for small, enclosed grow spaces)

Best for

Growers trying to light a large area with a small number of lights. Best used with powerful bulbs (600 or 1000 watt), to get sufficient intensity with such a large coverage area. Great as a vegging-only light.

Double Ended HPS Kits Vs Regular
Double ended bulbs are more efficient, giving you more output from the same wattage. They also last longer.

Naturally, there’s a drawback. They are more expensive (especially the reflectors) and they generate more heat. They are also generally made to run on 240V only and they almost always only come with an HPS bulb.

If you are set up to run 240 volts and you can deal with the additional heat, a DE reflector kit makes sense.

Summary
What I’ve listed has only beneficial matter as you will gain experience along the way of using one of them. Just compare them if you have doubts and conclude if it suffices your taste.

Goodluck!

Growing Marijuana in Soil vs Hydroponic Systems

One of the biggest debates in the growing world is over hydroponic vs soil cannabis cultivation. There will never be a comprehensive answer as it really depends on what suits you as a grower, and the environment you live in. Here we run through some of the pros and cons of both mediums so that you can make the decision for yourself.

Image placeholder title

Soil is better for:

  • Ease – it is more straightforward than hydroponic growing
  • Price – it is cheaper to grow outdoor in soil as you need less equipment
  • Bigger yields as your plants have space to grow as big as they like

Hydroponics is better for:

  • Control – in a hydroponic set up you can control the temperature, lighting and humidity
  • Flavor – thanks to the controlled environment hydroponically grown cannabis is likely to be tastier
  • Speed – cannabis plants grow faster when grown hydroponically

What is the difference between hydroponic and soil cannabis cultivation?

In general, cannabis that is grown hydroponically is grown inside and plants grown in soil are grown outside. There may be some growers that use soil indoorsbut this will usually be mixed with coco coir or other similar substance.

Growing cannabis in soil is a pretty similar experience to any other gardening you might do and is the most traditional and natural method of growing. Hydroponic is a term that is frequently used to describe any other medium used for growing cannabis that is not soil, but is most often referring to cannabis that is grown within a water solution that has nutrients added to it.

What are the Pros and Cons of Soil Cultivation?

As it is likely that you will have used soil in some regard before to grow plants in, this medium is the recommended method for beginners to the growing world. It is generally the easier and cheapest medium for growing and purely requires you to have an outdoor patch in which you can plant your seeds. With soil cultivation you can expect bigger yields than with hydroponics because you are not restricted by space – your plants can, therefore, grow as big as they like.

However, growing in soil does have its drawbacks. With this medium, there isn’t a whole lot you can do to control the quality and taste of your harvest. While you can add nutrients to your soil, you have to leave the temperature, rainfall, humidity and sun exposure to mother nature and hope that it works in your favor.

What equipment do I need for Cannabis Cultivation?

With soil cultivation, there isn’t much you need in terms of equipment. You will need indoor grow tents, weed grow lights, some containers and some good quality soil. Also, you can purchase a ventilation system, such as carbon filter and Inline Fans For Cannabis. Fortunately, there are plenty of soil mixes on the market that are specifically designed for cannabis cultivation. It is also a good idea to invest in some fertilizer for your plants to keep those pests away.

When it comes to hydroponic cultivation the set up is a little more complex and will depend on which hydroponic system you choose to go for. For all systems, you will need to invest in some good quality nutrients, grow light/s, and products that are able to control the temperature and humidity of your growing environment. In the next section, we review some of the best nutrients that you can use in your hydroponic system.

Conclusion

Deciding between growing your cannabis plants in soil or hydroponically is an important decision and not one to be taken lightly. There are pros and cons of each medium and a lot of it comes down to the space you have to cultivate, the amount of time you have to tend your plants and your budget.

Growing in soil is undoubtedly the easier and cheaper option, however, with hydroponics, you have much greater control over the success of your plants. Ultimately, the choice is up to you but whatever you decide we will be here to advise you along the way!

How high should grow lights be above cannabis?

You’ve got cannabis grow lights, your plants, all of your liquid nutrients, and everything you need to grow.

You set up your indoor grow tents, set your plants in place, strap your rope hangers to your lights and hang ’em. But before you switch those lights on, are you sure you know how high you need to hang them above your plants?

Hanging your lights too low can burn your plants, but hanging them too high can leave them stretched and weak. Some grow lights need to be hung far away from plants so they don’t get bleached, but some lights are too weak to hang more than 10 inches away- so what do you do?

Why do different grow lights need to be hung at different heights?

If your indoor garden is supposed to mimic a plant’s natural (outdoor) environment, then the grow light is the sun from which everything grows- only you have control over what type of light and how much of it your plant receives. That’s partially why growers say more light=better yields. But does that mean you should get more lights and hang them as close to your plants as possible without touching them?

Of course not.

It means making sure they receive enough energy to grow quickly without overpowering them. But to assure that your plants are getting exactly what they need- no more, no less- you’ll want to check the type of light you’re giving your plants: LED grow lights, HID grow lights, or Fluorescent Grow Lights. Some lights offer more heat energy, and others offer better spectrums, and each needs to be hung in a different distance from your canopy:

LED grow lights, for example, need to be hung farther away from your plants than HPS/MH grow lights to avoid bleaching the canopy of your grow room from strong spectrums.

On the other hand, T5 Fluorescent lights need to be hung closer to plants than HID’s in order to have an effect on them because the energy coming from T5’s isn’t strong enough to get plants growing when hung from a distance of more than 12″.

HID Grow Lights

ECO FARM HPS PARABOLIC REFLECTOR

For HID grow lights, you can use the “back of the hand” test as a general rule.

Simply hold your hand just above your plants where they are closest to the light, with the back of your hand facing the light source. Hold it there for about 30 seconds.

If your hand starts to get too hot for comfort, then the light will be too hot for your plants as well and you want to hang it higher. If your hand could be closer and still not feel discomfort, go ahead and bring the light closer.

You want your hand to get hot, but not unbearably so.

To get an idea of how high to hang you light to start with, consult the chart below. I’d always begin with the light at the upper end of the range and gradually lower it.

So, for example, a 1000w HPS distance from plants for bloom would start at 36 inches and gradually move closer.

HID Light Distance From Plants: Chart

LED Grow Lights

ECO FARM LED GROW LIGHT

Now, despite LED grow light not generating lots of heat like HID’s, their light spectrum can be overwhelming to lots of plant species if they’re hung too close. When this happens your plants will suffer from light bleaching, which will impact how your plants take in sun and convert it into energy for growth.

Simply put, what makes a light a “cool” blue light, or a “warm” red light, is the temperature of the light’s spectrum(s). LED’s are much more focused on light spectrum output than energy generation, so you actually need to hang them higher above your plants than HID’s to avoid light bleaching. Light bleaching can be just as bad for your plants as overheating them and will result in an underwhelming crop.

LED’s don’t generate lots of heat, but you’d be surprised by how high you have to hang them above your plants. Supplemental LED lights used to grow little patches of wheatgrass, herbs, and spices (15w-90w) need to be at least 15″ away from your plants. For higher wattage lights it’s even further:

(240-400w LED Grow Lights) 16-30” away from plants

(450-550w LED Grow Lights) 20-30” away from plants

(600-850w LED Grow Lights) 24-26 away from plants

(900w+ LED Grow Lights) 26-42” away from plants

Note: while HID’s need to be hung at a consistent distance throughout the plant’s growth cycle, LED’s will need to be moved closer to the plant during the flowering stage.

Fluorescent Grow Lights

 ECO FARM T5 FLUORESCENT GROW LIGHT

Fluorescent grow lights give you a nice, easy blend of energy and spectrum output. They effective enough to grow nearly any plant, but to do so, you’ll need to hang them pretty close.

What makes hanging fluorescent lights so tricky is that not all of them are the same. For instance, CFL bulbs can generate some decent heat over an extended period of time because of their compact size, whereas a longer 54w 2ft T5 grow light won’t generate lots of heat because it can dissipate it along its tube. Not only that, but the more bulbs you use the more heat you’ll generate, which is dangerous if it’s hung too close to the plants.

Fluorescent lighting isn’t known for kicking off lots of heat, but they will generate some heat while they run so you’ll need to watch your plants carefully for signs of burning or bleaching.

In general, you’ll want to hang your light no more than 12″ away from your plants.

This one’s not an exact science, unfortunately, because fluorescents come in different shapes and sizes. That said, we recommend the following:

– Start out at 5 inches above the canopy

– Compact CFL bulbs usually generate more heat than a long T5 grow lights, so measure the canopy temperature to assure you’re at a safe level to grow

– If canopy temps are too high, raise the light another inch and check the temp again

– Raise if the temps are too high, lower if the temp is too low

– Remember: after 12″ fluorescent lighting loses its power, so make sure you don’t raise it any more than 12″ above your canopy otherwise your plants aren’t getting light energy.

Why do we use a grow light?

Growing cannabis under lights indoors are something you might have heard about but haven’t attempted. Many people believe growing cannabis under lights is a costly and complicated business but the truth is anyone with even a little gardening know-how can set up lights for growing plants indoors.

It might be that the climate you live in just doesn’t suit your favorite plants or you could see vegetable crops dying or not grow big or tasty enough in your back garden.

Searching the internet for all the information can be frustrating and mean you don’t have all the facts you need before attempting to set up your own grow room. By bringing together all the relevant information, you’ll have a good idea of how to start your own growing as soon as you’ve finished this blog.

In this post, we explore the light spectrum for growing plants and give you all the advice and information you need about starting your own indoor garden.

HOW DOES IT WORK?

Put simply, a grow lights for indoor plants will help your plants or crops flourish in a place where there is little or no natural light. You might live in a Nordic country or in a climate that sees the shorter amount of daylight hours at certain times of the year. This is when a grow light will help you continue to keep your plants healthy.

The right amount of light is absolutely crucial to a plant’s survival. A plant needs to be able to photosynthesys to live. This is where a plant takes in light and converts it into a chemical which is then used to give the plant food and water. A by-product of photosynthesis is oxygen, which means the harmful carbon dioxide on our planet is turned back into oxygen by this process.

A weed grow light will replicate the spectrum of light that is similar to our sun although you can buy specific lights to boost specific plants. Growing plants under lights have been done since 1868 when Russian botanist Andrei Famintsyn used the process in his research – so it has definitely been a tried and tested method for a long time! Without the right amount of light, a plant will grow long and thin and any vegetables or crops will be small and bitter (think about tomatoes if you’ve not put them in a place with enough sun).

When you purchase produce from the grocery store and the items have a tart or bitter tastes, this usually means they were grown without adequate light.

COLOR

Different colored lights do different things for each plant. The problem is there is a lot of misinformation out there and a lot of lights on sale have different colors, combinations, and strengths. There are a lot of different opinions but the science shows plants only need two color lights – red and blue.

The ideal LED you should use for growing your plants should be a red LED, a blue LED or UV LEDs. There is some more in-depth information about spectrums and wavelengths that perform the best but this is the basic information you should know.

The reason for this is that all green plants absorb UV light, blue, red and infrared spectrums but the green and yellow is not used as well. It doesn’t mean that green and yellow lights are completely useless, but it does mean that you won’t see as good results as you will if you’re using a red or blue light.

So, if you’ve already invested in some lights but you aren’t getting the results you were hoping for, then have a look at the colors of your lights to see if that will make a difference. If this was the issue, then you should begin to see a positive result within 24-48 hours.

The Pros and Cons of the Different Types of Grow Lights Available For Indoor Agriculture

CHOOSING A GROW LIGHT

Choosing a grow lights for indoor plants can be confusing if you’re not familiar with the process, especially since there are so many different types of lights you can use to grow plants that it can seem overwhelming. The main types are Fluorescent Grow Lights, HID Grow Lights, CMH Grow Lights, LED Grow Lights (light emitting diode).

FLUORESCENT GROW LIGHTS

Fluorescent grow lights are cheap but last a lot longer than an incandescent bulb and don’t get as hot. In terms of colors, fluorescent lights give off a blue light and these lights are pretty easy to install. You will recognize these lights from offices and warehouses where the long thin tubes are pretty recognizable. A lot of garages and outbuildings may already have these lights installed so you may have half the set up already if you check.

Fluorescent tubes are measured by their diameter. Each “T” represents one-eighth of an inch. A T5 Fluorescent grow lights is five-eighths of an inch in diameter, a T8 would be one inch in diameter, and so on. T5s are best used during the propagation stage of plants, since they run cool.

Pros of T5 Fluorescent Grow Lights

  • Generally less expensive than other types of grow lights.
  • They emit light that covers a larger area than most other types of grow lights.
  • They typically have a much longer, useful life that other kinds of grow lights.

Cons of T5 Fluorescent Grow Lights

  • Are not useful during the vegetative stages of growth.
  • Are not useful during the flowering stages.

HID Grow Lights

HID grow lights(HPS grow light/ MH grow light), are large-bulbed systems that create light by igniting a gas inside the bulb. HIDs are available in two types:  MH grow lights(Metal halides)  and  HPS grow lights(high pressure sodium). There is a third type, which is a hybrid between the two, as well. All types of HID grow light kits work by arcing an electric current between two tungsten (W) electrodes which then ignites the gas in each particular bulb.
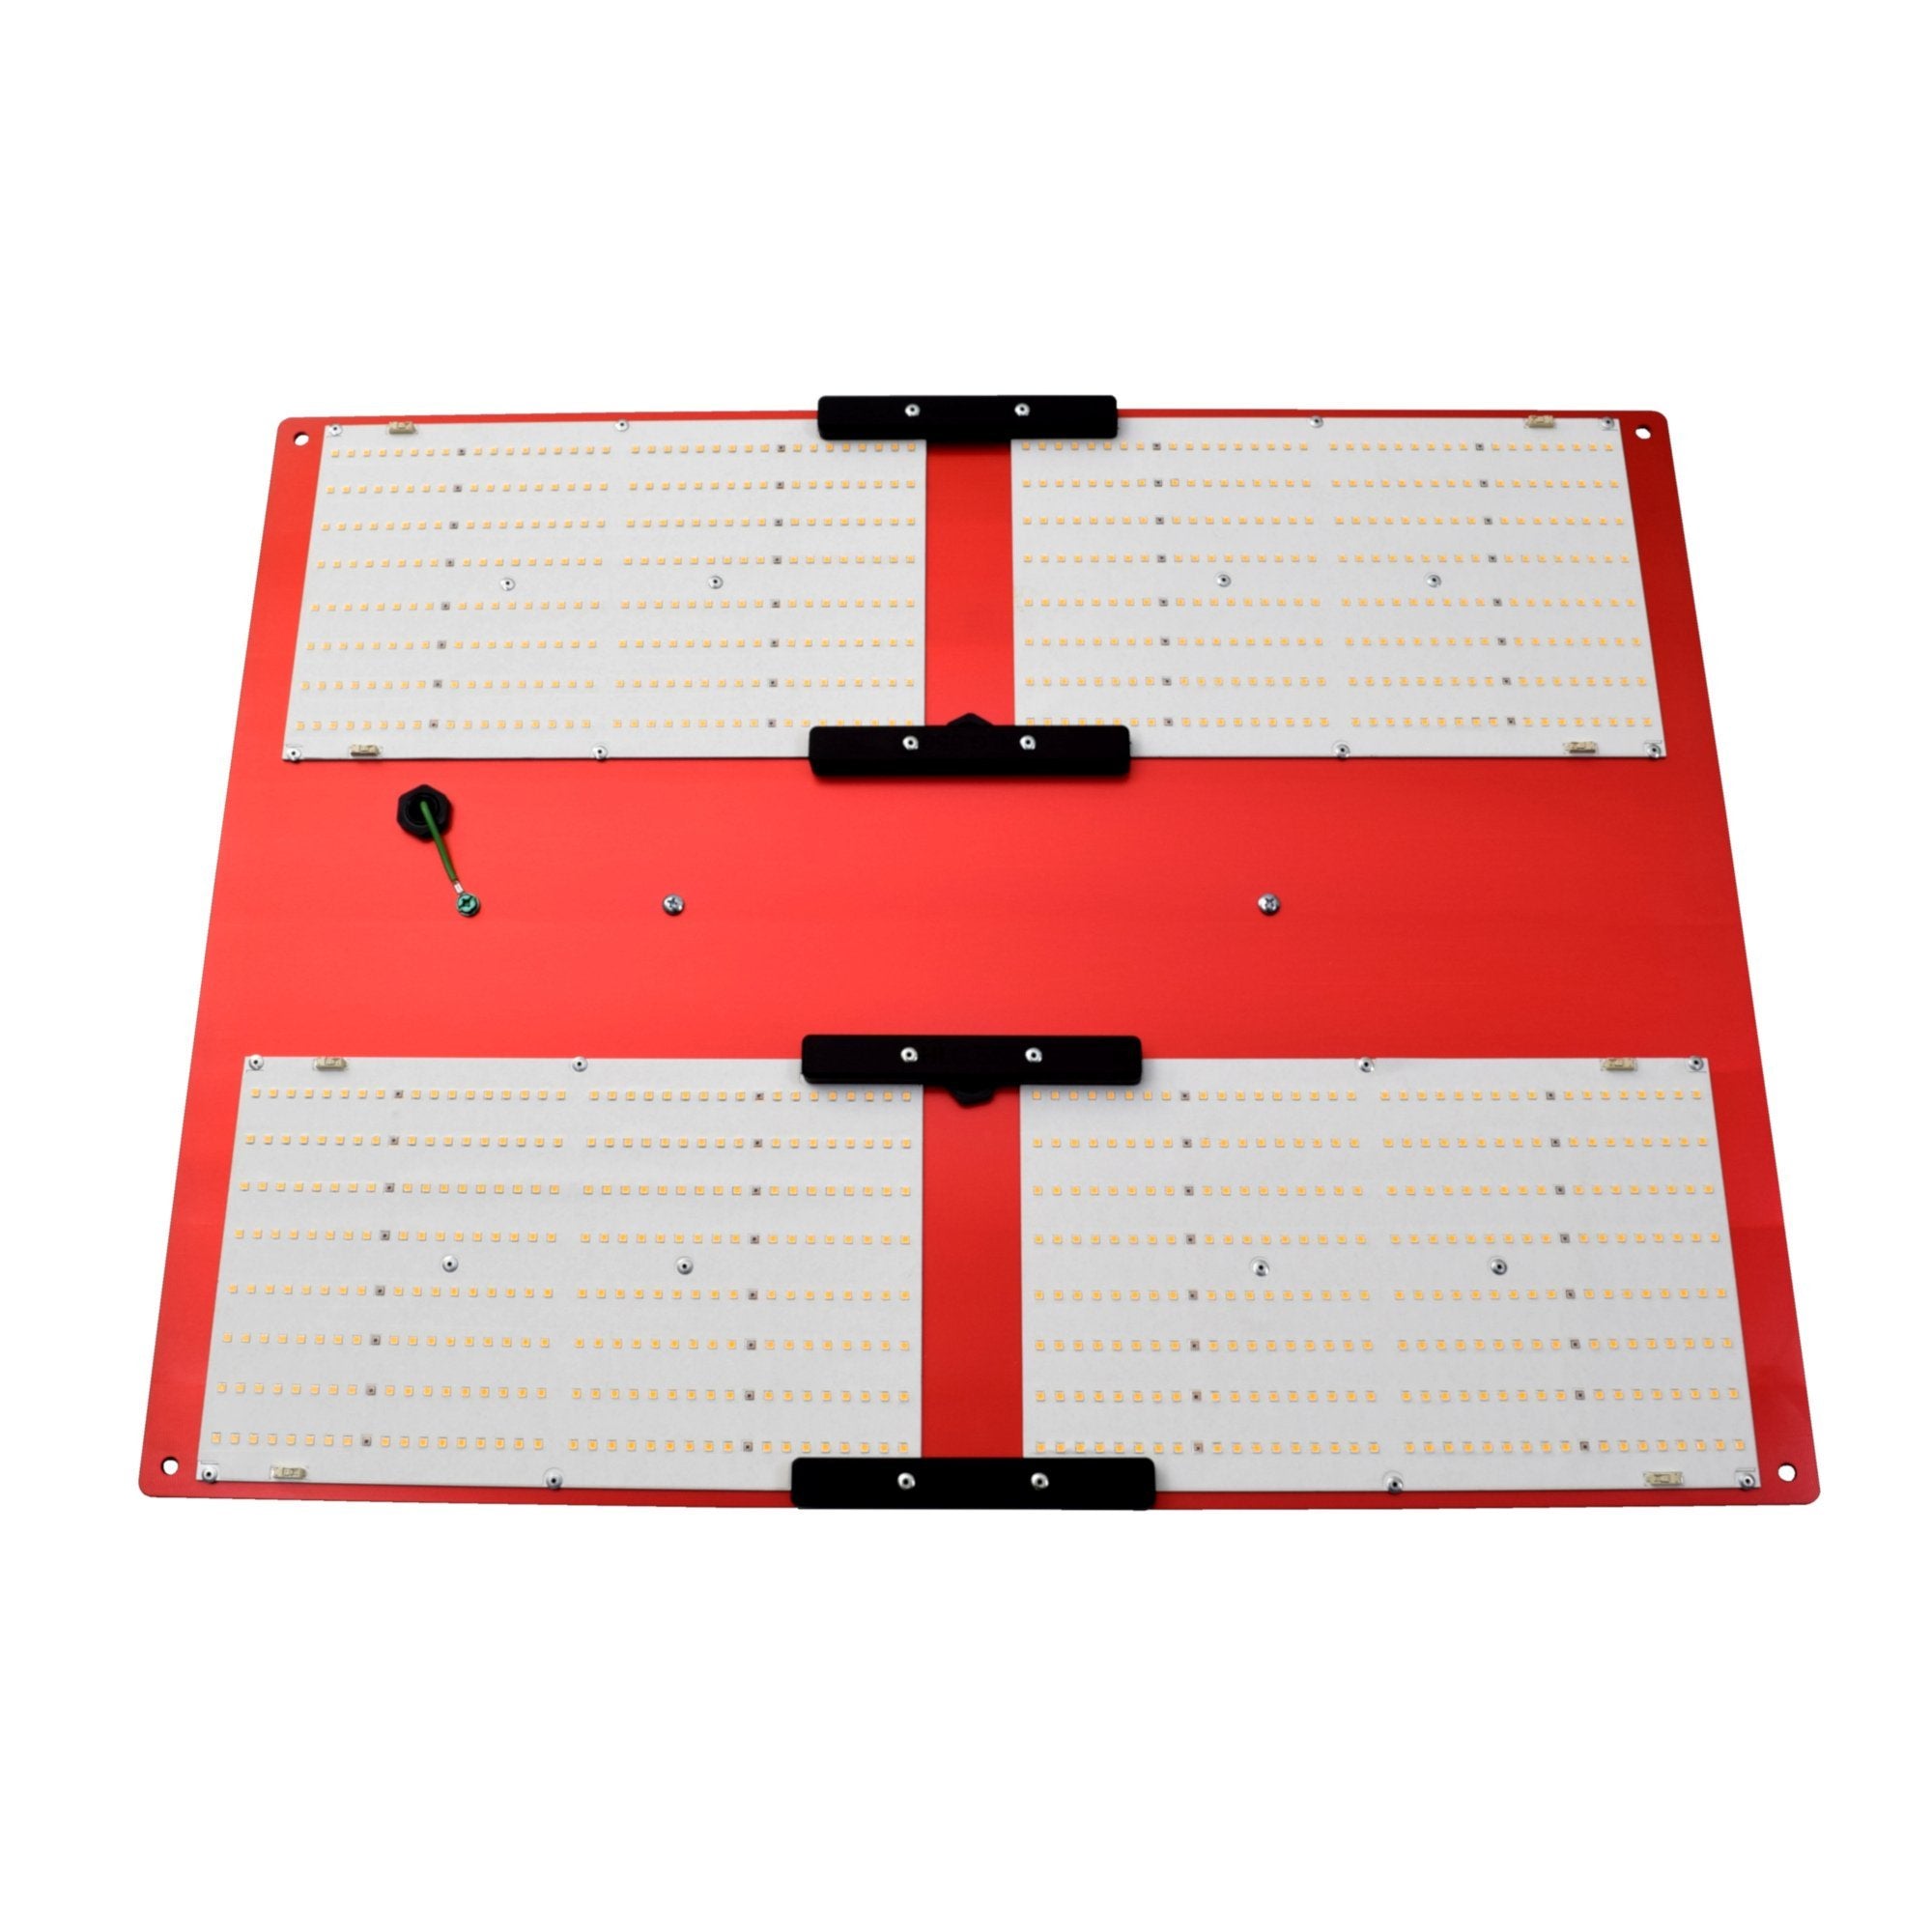
Metal halide lamps burn gas that produces lighting on the blue end of the spectrum which is beneficial during the vegetative phase of a plant’s development. High pressure sodium lamps produce light on the red to orange portion of the spectrum and are useful during the flowering stage of a plant’s cycle.

All HID grow kits include the bulb, a ballast, and a reflective hood of some sort to increase the amount of light available to the plants. An HID ballast can be traditional, magnetic ballast that uses coils and condensers to regulate the output, or digital ballasts are also available that use circuitry to regulate the lamp’s outputs.

Pros of HID Grow Lights

  • HID bulbs are often dimmable, which can be useful to customize the amount of needed light for a given area.
  • If using a digital ballast, all types of HID bulbs can be used without changing the ballast.
  • HID lights produce more usable light than fluorescent bulbs.

Cons of HID Grow Lights

  • HID bulbs produce high amounts of heat that can burn plants if not monitored or taken into consideration when placing them into a grow room.
  • They require additional hardware to operate, such as a ballast and a reflector. Some HID ballast will only operate MH and some will only operate HPS, meaning multiple ballasts may be required.
  • The effectiveness of each bulb diminishes over time, meaning that it is important to note how long a particular bulb has been in use and change it before it ceases its usefulness.

CMH GROW LIGHTS

CMH grow lights both also refer to types of single-ended HID lights. They (LEC and CMH) are also essentially used interchangeably with one another as they are the same type of bulb.

An LEC (or CMH if you prefer) light operates in much the same way as its metal halide cousin, but instead has a ceramic arc (like HPS bulbs) instead of a quartz one. Just as in the section above on DE lighting, the pros and cons listed below are as compared to other HID lights.

Pros of CMH Grow Lights

  • LECs last on average twice as long as MH or HPS bulbs.
  • LECs, because of the ceramic element, burn much hotter than MH, producing a light closer to that of natural sunlight. Due to their insulating value though, they also have a lower heat output, which means there is less likelihood of burning plant leaves as compared to MH or HPS bulbs.
  • LECs can produce light spectrum sufficient to support both the vegetative stage of plant growth as well as its flowering stage.

Cons of CMH Grow Lights

  • Only magnetic ballasts can be used for LEC bulbs and they cannot be placed on an angle; only straight up and down or horizontal.
  • Cost. Being a newer technology, these are still fairly pricey.
  • There is a danger to growers due to the amount of UV light produced by LECs. Growers are advised to wear long-sleeved shirts and sunglasses if they are going to be working under any LEC lighting.

LED Grow Lights

Horticulture Lighting Group HLG-550 V2 Rspec Full Spectrum LED Grow Light
Horticulture Lighting Group HLG-550 V2 Rspec

LED grow lights are also relatively new in the world of artificial lighting, but are being widely used. The benefits to using LED grow lights are numerous, but the major obstacle to switching over to them is the high initial cost.

As LED grow lights continue to become a major player in the world of grow lights, it is likely that their costs may continue to drop into a range that is more affordable to most home growers.

Pros of LED Grow Lights

  • LEDs are energy efficient and are among the cheapest sources of artificial light to operate. They produce more light per watt than either fluorescents or HIDs. However, there are exceptions to this.
  • LEDs run at cooler temperatures. Besides the energy savings, this means that the chance of burning your plants if considerably less than with some other types of grow lights. They are also among the longest-lasting of artificial lighting options.
  • They are usually able to be directly plugged into to standard electrical outlets; some types can also be used in traditional light fixtures as well (no ballasts required for LEDs).
  • The range of color spectra available is wide and can be customizable and adjustable depending on crop being grown and what stage of development.
  • There are many manufacturers producing LED lighting with a wide range of features and benefits.
  • LEDs are generally considered to be the easiest grow lights to use.

Cons of LED Grow Lights

  • Cost can be prohibitory when it comes to opting for LEDS. They are many times more expensive than other grow light options.
  • Some LEDs, in an effort to reduce consumer cost, emit less light than other types of grow lights. You can avoid this if the LED light selected is at least 2.0 micromoles per watt of energy.
  • Depending on manufacturer, LEDs are not always strong enough for the flowering phase. This drawback may become obsolete as technology improves, and even now some LED systems do produce enough light, but be sure to do your homework when selecting the right LED for your particular crop.
  • Reflectors may be needed to realize the full benefit of your LED lights. This may not be a true “con”, but unlike with HIDs, where it is expected, most LED systems are sold with the contention that no other items are required.

CONCLUSION

Hopefully, you’ve found this list helpful and it will make sure you know where to start when planning your indoor growing. While there are a lot of options out there, this list should have explained what you should be looking for and what to avoid when growing plants under lights. Remember to choose your cannabis grow light carefully and don’t listen to a lot of the false advice and misinformation that is around when it comes to creating your own indoor growpackage. With these tips in mind, you’ll be creating beautiful blooms or giant vegetables in no time.

If you’ve got any other tips for growers who want to use this method, please comment below. And if you’ve found the advice useful, please share this post with your friends and family.

The Main Types of Grow Lights for growing cannabis

Types of grow lights for indoor cannabis cultivation

How do we light our cannabis growing space?

When we decide to set up an indoor cannabis grow for personal use at home, there are many factors to take into account if we want to get the best results, but one of the most important to consider is the type of cannabis grow lights and its power consumption.

When deciding on the type of light to use, we must keep in mind that each technology has its different advantages and disadvantages with respect to growing cannabis. Certain types of bulbs will offer the best yield (lumen per watt) but at the same time they are a considerable heat source that can cause problems to many growers, especially those that live in particularly warm climates or are only able to grow cannabis in small spaces.

On the contrary, other types of illumination emit almost no heat at all, although often the high price of this kind of lighting, combined with its lower effectiveness when compared to other systems, combine to make them less popular. They are, however, indispensable to the many indoor growers that can only cultivate cannabis successfully thanks to the low heat emission of these lights.

The correct light spectrum for cannabis plants

When it comes to the to the colour temperature of the light spectrum, cannabis plants will benefit from receiving blue light (450-500nm) during their vegetative growth stage, and red light (610-750nm) during the flowering period.

When rooting clones and in the first stage of starting seedlings, many growers use simple fluorescent tubes or CFL lightbulbs with a blue spectrum. For plant growth and pre-flowering, many will begin to use lights with the same spectrum, but with greater power, such as Metal Halide lamps. This encourages the structure of the plant become stronger and hardier, preparing her for abundant flowering.

Red spectrum lights are used for flowering cannabis plants, as this is the colour range that best imitates the spectrum of sunlight during the autumn months, when outdoor cannabis is naturally in flower. In this case the most commonly used are HPS grow lights, increasingly followed by LED grow lights due to their good results, lower energy consumption and most significantly, lower heat emission, which is the main problem with high pressure sodium systems (HPS).

On the contrary, most green light is reflected by the leaves and therefore  has no effect on cannabis plants, making it the perfect colour spectrum to choose when growers want to work on their flowering plants with the lights off, without disrupting the dark period and stressing them.

Lighting systems for cannabis plants

HID Grow Lights

High Intensity Discharge (HID)(You may also hear: High Pressure Sodium, HPS, Metal Halide)

HID Grow Lights is the most common type of grow light for general purpose indoor applications-extremely efficient and capable of producing intense light indoors. Metal Halide (MH) MH grow lights give off a bluish spectrum, perfect for vegetative growth. They also contain some ultra violet radiation (UV) which is useful for combating pests, molds and promoting the production of essential oils in aromatic crops. High Pressure Sodium (HPS) HPS grow lights emit a yellow / orange light that simulates the fall sun-perfect for flowering and fruiting. Many growers combine HPS and MH lamps as a hps grow light kit to provide a better overall light spectrum for their plants.

LED Grow Lights

LED Grow Lights(Light emitting diodes) have become the grow light of choice for many professional and hobbyist growers alike. These products can emit light in wavelengths ranging from 250 nm to more than 1,000 nm.

Most plants require wavelengths of light ranging from the blue section of the spectrum at about 450 nm to the far-red end of the spectrum at about 730 nm at different times of their development. Light emitting diodes have the capability of having their spectra manipulated to efficiently capture the nuances of the emitted wavelengths.

These lights are also favored because of their long life and efficiency. They have been shown to last more than 50,000 hours, with efficiency usually ranging from a low of 38 per cent to a high of more than 50 per cent.

They are also extremely useful for growers because some LED grow lights can emit light in specific ranges of wavelengths to support plants during their vegetative and blooming phases. Light emitting diodes do not require the addition of any kind of reflector, as the light is directly emitted towards the plants and not dispersed like other types of grow lights.

Fluorescent Grow Lights

Popular for propagation, early vegetative growth and over-wintering semi-hardy and tender plants. T5 fluorescent grow lights are the most modern type. They are available as single, daisy-chainable strips or in panel arrays. Lamps need to be matched to the fixture (high output (HO) or very high output (VHO.)) Different spectral distribution lamps are available-most common and “daylight” and “bloom.” Daylight lamps are used for propagation, vegetative growth and over-wintering. Bloom lamps are commonly used as side-lighting for larger plants flowering indoors.

CMH Grow Lights

CMH grow lights belong to the single-ended category. They can be substituted with each other since they come from the same family.

CMH grow light comprise of a ceramic element to give a higher intensity of light that can actually mimic natural sunlight. The addition of insulation also ensures control of the heat output so that crops aren’t burned. The lights are able to produce enough light to support vegetative and flowering stages, which is a great plus.

The cmh grow lights kits are longer-lasting than DE lights and real like the natural sunlight. They can support all growth stages.

Summing up the different types of grow lights

There are different types of grow lights out there and every type has its pros and cons. For small growers (1/2 to 1 ounce of Cannabis per month), LED grow light will definitely be your best choice. If you are a bigger grower you should definitely look into the newest models of LED grow lights. Older LED grow models will not outperform HPS grow lights. Nowadays all the new LED grow light models outperform the HPS because they often don’t need extra setup and are super low on electricity.

Best Carbon Filter for Grow Room Guide: Reviews (2019 Update)

What is the best way to get rid of the unwanted smell in your grow room?

This best carbon filter for indoor grow tents guide has got you covered! There are hundreds of options that are available, but this does not mean that you can settle with just any other option. Keep on reading and learn from the things that I will be sharing in the rest of this post.

What is a Carbon Filter and How Does it Work?

Best Carbon Filter for Grow Room

A carbon filter has the primary function of removing impurities in the external environment, which is vital when it comes to odor management. It can exist in various forms, such as a carbon block water filter. Those that are mentioned in this post, on the other hand, exists in the form of carbon air filters.

When you are growing indoor plants, including cannabis, you will use fertilizers, nutrients, and pesticides, among other things. While it can indeed bring some benefits, it can also lead to a foul odor. The unpleasant smell can be strong and can reach even outside the grow tent. This is the reason why you need to invest in the best carbon filter for grow tent.

More than odor management, a carbon filter will help in the elimination of compounds that can cause diseases in plants. Through the ventilation that it provides, air-borne pathogens can be kept out of the grow room, promoting the best state of health of your plants.

Carbon filters can exist in two main forms. The first one is solely a carbon filter. The second one is more versatile – a carbon filter fan combo. In the case of the latter, the carbon filter can also function as an inline and exhaust fan.

Often in a cylindrical form, a carbon filter makes use of active carbon or simply a carbon that has been oxygen-treated. It is equipped with a highly-porous charcoal where air would pass through. As it passes through, the odor is also trapped, and hence, there is no foul smell that could escape. This is important when growing cannabis in a discrete manner.

How to Choose the Right Size of Carbon Filter

As you try to narrow down the choices, one of the first things that you need to take into consideration is the size of the carbon filter. If it is too small for the grow room, it might be unable to deliver effective performance.

To choose the size appropriate for the grow room, look at the dimensions. Multiply the length and the width of the grow tent, which will give you the calculation of the area. Once the area is computed, multiply it with the height of the grow room. After this, you will have the total volume or cubic feet. The result is the CFM.

What are the Other ways to Get Rid of Odor in a Grow Room?

While the use of a carbon filter is one of the most effective odor management solutions, there are other things that can be equally promising, including those that will be briefly mentioned below.

  • If you are growing cannabis, one of the best solutions that you might want to consider is the use of odor absorbing gels. The unwanted odor will be attached to the gel, and in turn, it will be replaced with a more pleasant smell.
  • Check for leaks in the exhaust. If there are leaks, odor will be able to escape easily from the grow tent.
  • You can also consider the installation of odor neutralizers. However, if you are growing marijuana, do not use odor neutralizers during the flowering stage as they can negatively impact the quality of the buds.

How to Take Care of your Carbon Filter

To keep the carbon filter in its peak condition and to make it last longer, here are some of the most important things that you have to keep in mind:

  • To clean the filter, all that you have to do is to remove it from the grow room. Take it to an open space where you can clean it easily. Shake it vigorously to remove any trapped dirt or dust. Spray water. Submerge it in a water with mild soap for about 15 minutes. Rinse and allow it to dry completely before putting back in the grow tent.
  • You have to dry the activated carbon under the heat of the sun to make it last longer.
  • Before using the filter, it is also necessary to have it vacuumed first. This is important to remove the excess carbon prior to its use.
  • After reaching the maximum capacity, do not try to have it spared. Using it beyond its lifespan will compromise its performance.

How to Set-up Carbon Filter in a Grow Room

To make sure of the best performance of the carbon filter, here are the things that you need to do:

  • Take off the carbon filter from the packaging and get ready for its installation. Place it on the exhaust, making sure that it is securely attached.
  • When installing the filter, make sure to connect it to the intake side of the exhaust.
  • An air-tight seal should be created between the fan and the filter. If there are gaps, it won’t do an effective job in filtration.
  • Provide support to the filter to make sure that it won’t fall. One of the best ways to do this is to use a rope. Choose the desired height and see to it that it is not too close or too far from the plants.

How to Choose the Best Carbon Filter for Grow Room

With the tons of the options that are available, here are some of the most important factors to consider to make sure that you will end up with the right decision:

  • Material: The main material that is used in the construction of the carbon filter is important not only in terms of durability but also performance. Premium materials can be more expensive, but they are sure to be worth your money.
  • Versatility: If you want the best value for the money, choose one that is multifunctional. With this, you might benefit from choosing a product that acts not only as a carbon filter, but also as an inline or exhaust fan.
  • Price: It is tempting to end up choosing a product that comes with a cheap price. It may be easy on the wallet, but when performance is compromised, it will be useless. With this, try to find the perfect balance between quality and cost.
  • Warranty: This is important if you want to have peace of mind. Within the warranty period, you can be guaranteed that it is free of defects. Otherwise, the manufacturer has got you covered, making sure of your highest level of satisfaction.

Our Top Picks for the Best Carbon Filter for Grow Tent

For the best way to control odor in a grow room, here are some of the products that hold a lot of promise.

Eco Farm Carbon Filter for Grow Tent

Eco Farm Air Filter

Coming first in our list is the Eco Farm carbon filter. It comes highly recommended by most users because of its unmatched performance.

The main structure is made of galvanized steel, which is by far more durable compared to aluminum. It shouldbe the best carbon filter for marijuana.

The base and filter flange of the main structure are switchable. The outer and inner mesh have sufficient open area for superior airflow.

What is probably most impressive about this unit is the reversible smell filtration. You can use it as an exhaust or intake filter. You can use it to filter, purify, or move air.

This unit is engineered for enclosed grow rooms. It will soak and get rid of unwanted smells. It promotes better plant health by ensuring that the air is always clean.

There are two ways you can install this filter. You can install it as an intake filter by placing the pre-filter outside or you can install it as an exhaust filter by placing the pre-filter inside.

The Good

  • Switchable base and filter flange for longer use
  • Can be used as an exhaust or intake filter
  • Inner and outer mesh offer a more open area for superior airflow
  • Zinc treatment is resistant to chemical corrosion
  • Galvanized steel air scrubber is highly durable
  • A lot of size to choose

Vivosun Carbon Filter

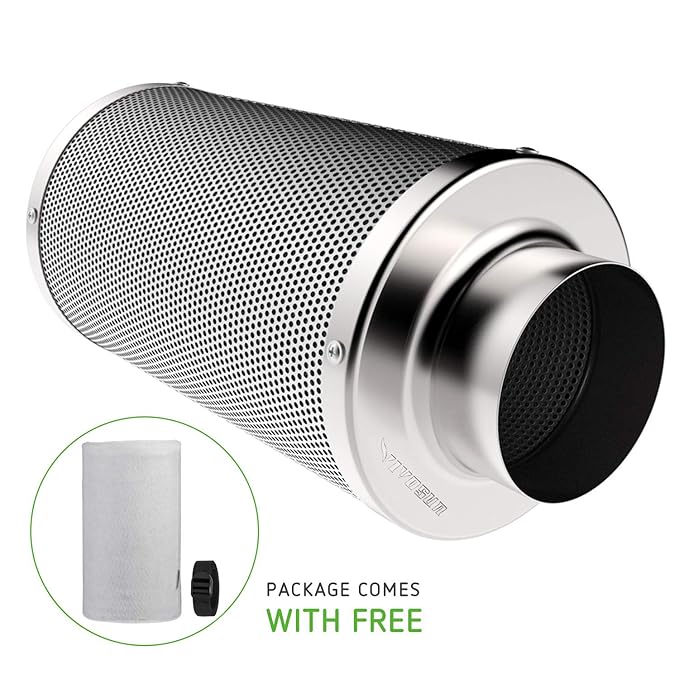
VIVOSUN 4 Inch Air Carbon Filter Odor Control with Australia Virgin Charcoal for Inline Fan, Grow Tent Odor Scrubber, Pre-Filter Included, Reversible Flange 4" x 14"

Coming last in our list is the Vivosun Carbon Filter. This one also features virgin Australian activated charcoal that delivers reliable airflow filtration.

It is incorporated with RC 48 (1050+) carbon that is very much capable of capturing more air contaminants than conventional filters.

Unlike traditional carbon filters, the Vivosun comes with reversible base and flange. This simply means you can flip the bottom and the flange to extend the filter’s life by a year or so.

The four-layered construction includes an outer and inner mesh. The mesh provides a larger open area for superior airflow. The design is also incorporated with a Velcro pre-filter.

You can use the Vivosun as an exhaust or intake filter in different configurations, such as with ventilation ducts, air exchange fans, and six-inch Inline Fans For marijuana.

The Good

  • Outer and inner mesh allows for effective airflow
  • Reversible base and flange provides longer life
  • Can be used as an exhaust or intake filter
  • Carbon particles used to eliminate more air contaminants

The Bad

  • May not be suitable for a larger grow room
  • Pre-filter has a shorter life

Final thoughts

Grow tents for cannabis are awesome, but they need to be ventilated correctly. The most important thing is to extract the hot air away not just out of the tent itself, but out of the room.

These days most grow rooms have their extraction fan positioned in the roof. This is ideal because you can remove the hottest air, and it makes for easier positioning of the extraction fan.

With that said, you can ensure your plants breathe purified air by attaching a high-quality carbon filter to your extraction fan system.

Choose one of the reviewed top rated carbon filters for grow tent from our list. The aforementioned buying tips should also help you make a profound choice.

NEW GROW TENT STYLE-2 IN 1 LODGE STYLE-TopoLite vs VIVOSUN vs Eco Farm Grow Tent

ECO FARM 2 IN 1 LODGE STYLE GROW TENT
ECO FARM 2 IN 1 GROW TENT

The 2 in 1 grow tent has a feature of two stations with three separate growing areas, allowing gardeners to manage plants in different stages of development while remaining compact for small. The small and large side is separated by a sheet of the tent material with Velcro for safety. This allows you to keep them separate or use it as one bigger tent.

This 2 in 1 indoor grow tent can offer much more growing space. You can grow seedlings at the 2-tier small tent, and transfer them to the larger tent after they grow taller. This allows extremely short harvests time by continuous growing new plant into the flowering chamber.

Here, we take a look at some of the best 2 in 1 grow tents kit to give them a helping hand. And we explore the factors to consider when choosing the right one for your plants.

ECO FARM 2-In-1 Mylar Reflective Grow Tent For Indoor Hydroponic Growing System(Our Top Recommended)

ECO FARM 2 IN 1 GROW TENT

The Eco Farm 2 in 1 indoor grow tent have 4 sizes to choose from, smaller chamber on the right acts as a nursery for younger plants. It’s divided completely from the left-hand chamber with a removable sheet of Mylar. That gives you the flexibility to create entirely different microclimates.

The right-hand chamber comes with a central shelf, allowing you to further subdivide the space. Put seed cones on the shelf to germinate, then move them to the bottom as they mature.

When your plants are bigger still, they can move into the left-hand chamber. It’s a design that gives you plenty of versatility. And if your needs change over time, you can remove the central divider altogether to create one big space.

A 600 watt LED grow light works best here, and a 4-inch inline carbon filter. Bear in mind too that if you’re using the central divider, you’ll need separate ventilation systems for each chamber.

It comes with three different floor trays. So whatever configuration you’re using, you’ll be able to keep the bottom of the tent clean.

The frame is made of metal and it’s good and sturdy. You can choose the diameter of the tubes and the material of the connectors by yourself. It’s easy to put together too – an averagely handy person will be able to complete it in about 20 minutes.

The outer shell is an extra-thick 600D canvas. It won’t tear, and all the seams are double stitched to avoid pinprick holes letting in light. The Mylar interior will reflect 98% of the light back inside the tent.

There are a multitude of vents too. There are four round four-inch diameter vents, four that are six inches in diameter, and three rectangular mesh covered vents.

The tent also comes with a cute extra – a mesh fronted tool bag to store your bits and bobs.

The zippers here are a little stiff at first, but after a few uses, we’ve found they run smoothly enough.

If there’s one area where we think this could be improved, it’s the central divider. Because this is simply a sheet of Mylar, fixing it perfectly in position is tricky. If you want complete separation between the two chambers, you’ll need to spend a bit of time getting it right.

Pros:

  • Option to create multiple growing environments
  • Good quality canvas and double-stitched seams retain 98% of light inside the tent
  • Comes with three-floor trays and a handy tool bag

Cons:

  • Zippers can be a little stiff to operate at first
  • Central divider is tricky to get perfectly in position.

TopoLite 2-In-1 Indoor Grow Tent

If you’re looking for a grow tent to support your plants at various stages, TopoLite 2-In-1 Indoor Grow Tent is worth considering.

One side of the tent is divided horizontally with two shelves, perfect for propagating seedlings. The other side is full height, with plenty of space for more mature plants to grow and bloom.

The design is flexible too. If you prefer, you can remove the central divider and shelf to create more space for bigger plants.

The frame here is made completely of steel – and that includes the corner pieces. It makes it very sturdy and durable. There’s also a metal support beam from which to hang equipment such as a light, inline fan or carbon filter.

The tent is a good size– six feet tall, four feet wide and three feet deep. TopoGrow also makes one smaller, and two larger versions.

The shell is made of 600D black Oxford cloth. It’s completely plain, so if you like a minimalist aesthetic it’s a good option.

Inside, the lining is diamond patterned Mylar, which TopoGrow say is 100% reflective.

There are vents for exhausting, secured with cords and toggles.

And there are mesh-covered Velcro pockets along the sides. These allow you to view the interior without opening the tent and affecting the growing environment. Unfortunately, though, there are no windows at the front. It’s not a deal-breaker, but they would have been a helpful addition.

Bear in mind that this tent will need a ventilation system capable of circulating air around both growing spaces. An easy way of dealing with this is by using a tee to split the air flow from your fan.

Take care, too, not to overload the hanging beam. Position your equipment so that it’s equidistant from the two hooks to avoid the risk of the whole thing collapsing.

Pros:

  • Handy dual chamber design supports plants at different stages of growth
  • Flexible design can be adapted to meet changing needs
  • All-steel construction makes this durable and robust

Cons:

  • No viewing windows at the front
  • The hanging beam isn’t as strong as some others.

VIVOSUN 2-In-1 Indoor Grow Tent

VIVOSUN grow tents have a unique design that allows you to propagate seedlings or clones at the same time that you are growing mature plants. This design allows you to streamline your grow operation and lets you decrease the time between harvests signficantly. The tent is divided into two chambers, the larger chamber for your mature plants and the smaller chamber has a twi tier shelf for multiple seedlings or clones.
 
Each tent is made of high quality 600D canvas wih reflective mylar sheeting on the inside. The frame is made of durable and strong metal. Each tent also comes with a flood-proof floor tray.

Pros:

  • Two-in-one design for growing mature plants and seedlingsor clones at the same time
  • Durable 300D cloth and reflective mylar sheeting
  • Choose from three sizes

Cons:

  • No warranty
  • Does not come in larger sizes
  • Multiple lights required if you want to separate out the shelved area

Buying Guide

Still confused about which is the right grow tent for you? Here’s our handy guide to making that all-important selection.

Size Matters

Two things will determine the right size grow tent for your needs. The first is the size of your plants. The second is the amount of space you have in your home to accommodate it.

If you want to house mature plants, check their dimensions – spread as well as height. You don’t want to damage them by crowding them too closely together. And remember – you’re expecting them to grow bigger over time!

A large grow tent will give your plants plenty of space – but it will take up a lot of room. Make sure it will fit into whatever space you’re able to set aside for it.

Remember too that some tents will have viewing windows. Most of these are on the front, but some are located on the sides. Wherever you position your tent, you’ll need room to stand in front of the windows to see inside.

How Much Equipment?

You’re almost certainly going to be using grow lights in your tent. What about a fan? Ballast? Reflectors?

Make sure that the overhead beam in your tent is strong enough to hold the kit you’re using. Add up the weights and check the specifications. The last thing you need is for the whole thing to collapse and squash your precious plants!

One Chamber Or Two?

Do you need a large space to let your plants grow tall and wide? Or do you also want to use your tent to germinate tender seedlings?

A two-chamber tent can offer more versatility than single chamber versions. They’ll include a smaller nursery chamber, often further subdivided with a shelf.

Seed cones and young plants do best sitting on the shelf. You can then transfer them to the floor of the nursery, and finally to the other side, as they grow.

Look for options where the central divider and shelf can be removed. That way you’ll have the flexibility to accommodate larger plants if you need to.

If, however, you’re not going to be growing plants from seed, consider a single chamber tent. There are fewer components so it will be quicker and easier to assemble.

Ready To Choose?

We hope you’ve enjoyed our run-through of some of the best indoor grow tents available today. While their fundamental design is very similar, there’s plenty of variation too.

Consider what size will suit both your plants and your home. And check the specifications and warranty before making your final choice.

Our favorite is Eco Farm’s two-in-one grow tent. We love the versatility of the dual chambers, and the added extras of the floor trays and tool bag.

Whichever grow tent you choose, use it carefully and you’ll be rewarded with strong, vigorous plants. Happy harvesting!

Best 3×3 Grow Tent – Secret Jardin Grow Tent VS VIVOSUN Grow Tent VS Eco Farm Grow Tent

3X3 grow tents are arguably the smallest grow tents you can get. Many brands have the 3×3 grow tents are their smallest sized grow tents. These tents are ideal for tending to seedlings, of one or two mature plants. They do not have much space. You do not need to spend more, waste space if you only have a few small plants. The 3X3 grow tent is space efficient and is great for anyone to whom space is a major concern. The best 3×3 grow tents allow you to tend to your favorite plants even if space is a major concern to you.

There are many types of 3×3 grow tents. Getting the best one among them might not be very straightforward. You may not what to look for in a great 3×3 grow tent if you have never used one before. You do not have to worry though. We took our time to compile one of the best 3×3 grow tent reviews. The review will highlight the respective features of various 3×3 grow tents, as well as their pros and cons. The aim of the review is to ensure you get the best 3×3 grow tent for the money you have.

Secret Jardin 36″ x 36″ x 72″ Dark Room DR90 Grow Tent

Secret Jardin 36" x 36" x 72" Dark Room DR90 Grow Tent

The Secret Jardin 3’*3′ Grow Tent: MORE LIGHT PROOF, MORE EQUIPPED, MORE ROBUST!

The Secret Jardin 3’*3′ Grow Tent is specially lined with 95% reflective hammered effect mylar fabric (210D), to increase light intensity and improve light distribution. Light-proof, waterproof and pre-equipped for extraction and ventilation, the tents come with equipment bars to support lamps, and carbon filters.

The light generated by HID and compact fluorescent lighting systems is great for plants, but it can be a source of frustration for gardeners whose living areas are cramped or don’t have an extra room for an indoor garden. With a DarkRoom, however, those frustrations are a thing of the past. A DarkRoom is the foundation of a completely self-contained indoor garden, featuring a lightweight, durable, washable interior reflective lining that keeps more light going where it’s supposed to go: to the plants. The frame supports up to 65 pounds of lighting, ventilation or other equipment, and every unit has access ports that accommodate ducting or other equipment. DarkRooms can be assembled without tools in minutes by one person, and collapse just as quickly for storage. Improved DarkRoom II models also boast enhanced lightproofing measures, more cord access ports, and even stronger corner joints.

VIVOSUN 36″ x 36″ x 72″ Grow Tent

One of the most respected names in indoor growing tents is vivosun, and has brought you a best 3×3 grow tent which is undoubtedly made of the best quality. This grow tent is made up of extra thick 600D fabric which is 100% light proof and water proof.

The inside of the tent canvas is made of 95% reflective mylar coating, which means it would reflect almost all the light inside the tent and would increase the effectiveness of you lighting setup. The tent is very durable and long lasting, thanks to its durable frame with all metal connectors and bars.

The zipper on this tent is the best heavy duty zipper found on the market. The door unzips smoothly and the observational window allows you to take a peek at your plants without disturbing the environment inside. You will not need any tools when assembling this tent. The manufacturer provides you with a long 2 year warranty with the product.

Eco Farm 36″*36″*72″/84″ Grow Tent

Eco Farm 3*3FT(36*36) Grow Tents - SJ Style

Eco Farm best 3×3 grow tent is premium, the height of the grow tent can be chosen by yourself, perfect for use by all levels of growers from amateurs to pros. It allows the growing environment to be controlled and manipulated as needed. Open, close or vent system with fans to adjust temperature, humidity, CO2 levels, and light conditions.

Suitable for use with all growing systems (hydroponic, aeroponic and soil-based cultivation), this tent is compatible with all types of lights: Incandescent, LED, Fluorescent (Standard, CFL & T5) and HID (Metal Halide, High Pressure Sodium & Dual-arc). The outer shell is constructed from commercial-grade (210D/600D/1680D), puncture-resistant, waterproof, oxford nylon fabric. This material is completely non-toxic, mildew and fire-resistant, and also washable. The interior lining is highly-reflective, allowing plants to utilize all the supplied light without waste. The durable, fade-proof, advanced reflection surface is thermally adhered to the outer shell and will not separate or tear.

It also features industrial-strength, oversized (#10) coil zippers designed to curve and go around corners without opening or separating. Tabs are used to secure the door in the open position for convenience while working. The frame and all corner supports are crafted from powder-coated, high-grade, high-capacity tubular steel. Removable upper rails provide overhead support for lighting, odor control and ventilation systems. Without need for any tools, the unit can be completely assembled in minutes.

Final Words about 3×3 Grow tent


So after reviewing the best 3×3 grow tents for cannabis in the market in year 2019, we have decided that the best grow tent to buy is ECO FARM 36″x36″x72″grow tent yield.

As it is the leading manufacturer of grow tents in the market and all their products are made out of the very best materials. Also the reviews of other customers have been always very high with this product.

You will not regret buying this 3×3 grow tent for cannabis. As they say plants also need good care to grow beautiful, by buying this high quality grow tent you will just do that. We hope we have helped you in choosing a grow tent for yourself, and we welcome you to visit our other review pages of various grow tents.

Happy growing weed!

Your Guide to Reflectors: Which is Best for Your Grow Room?

Alright, let’s talk grow light reflectors. If you ask 100 growers what their favorite reflector is you’ll get 100 different answers. Some growers love wings because they’re cheap, others like the focus cool hoods give you, some growers love umbrellas, and so on and so on…

No two reflectors are made the same, so we’re here to help you figure out what’s best for you. Here we’ll discuss what makes the most popular grow light some grower’s favorite (and some growers’ worst nightmare): parabolic, wings, hoods, and air-cooled reflectors.

What is a Grow Light Reflector?
Reflectors help reflect and focus the light coming from your bulb. Without one a light bulb would just shine into the open environment. The light’s energy wouldn’t be focused on your plants, and while they would get a little bit of light, without a reflector there’s a good chance they won’t get the intense light they need to grow.

Wing Reflectors

One of the most popular grow light reflectors in the game are wings reflectors. Also known as “bat wing” reflectors, they’re known to help give a focused yet wide spread of light over your plants. Whether it’s a DIY wing you built or a professional double-ended wing, they’re used by first-time growers and pro’s alike.

The theory of how a wing works goes like this: when the light from your bulb shines it will hit multiple points of the wing and bounce back down on to your plants (and even a little further). Wings with a high arch give you a little more focus, whereas wings with less of an arch give you a widespread.

What makes them so appealing is their cost. Most are pretty cheap, and for the reflection, you get it’s a pretty good value. While they give you a good spread with decent focus, both spread and focus are slightly sacrificed with these types of reflectors. But that’s not necessarily a bad thing, especially if you’re a beginning grower who’s not too sure what they want out of a grow light or you’re growing in a confined space- like a closet.

Pro’s: Very inexpensive, simple to install and use, good coverage for the price

Con’s: Limited lighting area, non-air cooled (not a huge deal, but know that exposing the bulb to your open environment will raise temperatures and humidity levels)

Best for: Beginners and Experienced Growers on a budget

Parabolic Reflectors

Parabolic Reflectors may be falling out of fashion in some grow rooms, they’re still used to cover big areas. They may not pack the biggest punch, but what they lack in intensity they well make up for in coverage area.

Instead of the bulb running along the length of the reflector, the bulb from an umbrella comes out from the center of the reflector. With its circular shape, these reflectors allow the bulb to shine in a pretty open environment. While they may not give off lots of focused light, they’re actually pretty useful in the grow room- especially big ones.

Umbrellas don’t offer lots of canopy penetration, but that just means they can fill in lots of gaps in light your other lights aren’t getting. Big co-op indoor gardens will use hoods directly over their plants for intensity, and they’ll have umbrellas above those to help fill in gaps of light their hoods aren’t getting to. Say you’re working in a big greenhouse and you’re utilizing natural light: umbrellas can help give you similar light on cloudy days and give your plants light they may not get when the seasons change.

That’s not to say you can’t get intense coverage. In fact, the lower you hang the reflector the more intense the light from the reflector will be. It sounds like a no-brainer, but you’d be surprised how many people rule out umbrellas without thinking of moving the light closer to their plants. Just be careful if you do, because HID’s are still pretty hot no matter what reflector you have so don’t hang them too close when you’re using umbrellas.

Pro’s: Huge coverage area, lightweight and easy to use

Con’s: Low grow light intensity, physically large so you’ll need lots of room

Best for: Growers with lots of room and in need of a wide coverage area; Warehouse/large greenhouse growers that need a less-intense light to fill in gaps of coverage

Hood Reflectors

Hood reflectors offer the best intensity for plants out of all the reflectors around. Big or small, wide or narrow, hood reflectors help direct the light from your bulbs down on to your plants to give them the best light they can get.

Hoods are great for really any type of indoor garden. From a closet to a warehouse, hoods give you intense light and good canopy penetration for good growth. What’s better is that there are two types of hoods depending on what type of light you’re going for: squat and wide, and tall and narrow.

Both offer square coverage over your canopy, but they offer different benefits. Wide, squat hoods are great for giving you a wider coverage area than narrower hoods will.

Though the light may be less intense, wide hoods can be hung lower to your plants to increase intensity without sacrificing coverage. Taller, more narrow hoods don’t give you a large coverage area but they pack a punch- so much so that you need to hang them higher than most other lights.

Given the shape of the shell and the contours of the reflective material inside, these types of hoods project an intense light directly down on to your plants.

Pro’s: They come in a variety of shapes and sizes for lots of needs

Con’s: They offer a limited coverage area directly down on to plants (not a lot of spread)

Best For: Beginner and Advanced growers in small spaces or large grows with supplemental lighting

Air Cooled Reflectors

Ah, everyone’s favorite reflectors: Air cooled reflectors. They have the ability to lower the heat your bulbs give off, they’re pretty compact, and being hybrids of other reflectors they offer something for everyone.

Air cool reflectors have two key features: a glass lens and air ducts. The glass helps a lot of the heat generated from your bulbs stay confined inside of that reflector. Air ducts let you connect high output fans to the reflector in order for you to move the air in the reflector out of the reflector. That helps reduce heat stress to your plants which allows you to hang your lights a little closer for more intense light on to your plants.

One of the great things about them is their versatility. With the exception of the umbrella, there’s an air-cooled version of any type of reflector you’d like. There are air cooled hoods for hood lovers, cool tubes have small wings to help spread light a little like wings do, cool tube hoods for growers who want the best of both worlds, and in loads of sizes.

There are really no drawbacks to using an air-cooled reflector, especially if you’re already used to growing with the non-cooled version. The only thing is that they don’t usually through a big coverage area, so if you have lots of plants to grow you’ll want multiple lights

Pro’s: Keeps your bulbs cool and limits direct heat down on to your plants

Con’s: Their glass shells take lots of the heat from the bulbs, so they will need some distance between themselves and your canopy

Best for: Any type of grow room and any level grower!

Gorilla Growtents vs Secret Jardin Growtents vs Eco Farm Growtents

Are you on the fence as to what grow tent you should get? With so many options it’s hard to know which one is the right one to purchase.

If you’re a beginner, starting out with your first grow operation, it’s important to go with the right equipment so that you don’t need to upgrade later down the road, which is why it’s important to narrow down your choices of grow tents.

But which of the two should you ultimately get? Read on to find out…

What’s A Grow Tent

For those not in the know, a grow tent is a small, portable grow room that you can set up anywhere and anytime. Very similar to a grow box, a grow tent provides you with an ideal indoor growing environment the same way a grow box does, but it’s more convenient.

The only difference is the structure between the two since a grow box is built using components that are more permanent, while a grow tent uses fabric and can collapse when not in use.

Gorilla Grow Tents

Gorilla Grow Tents

If you want a brand that is already known for quality products, then Gorilla Grow Tent is your top choice!

They have years in the business and create top-quality grow products that are used by many.

Gorilla Tents are known to the thickest, strongest and tallest in the industry, with the original grow tent revolutionizing the industry.

Their tents have a patent-pending adjustable height extension kit that allows users to grow their tent space all the way up to 9’ tall if they have the space. This in turns makes your plants grow bigger by 50%.

Other tents are limited to only 6’ tall so this is a huge benefit if you’ve got the room for it. And all of the tents are made using 1680D threaded, reflective fabric that is anywhere from 3 to 9 times denser than any other setup, which translates to a more durable, stronger, safer and lighter setup.

Plus, Gorilla Grow Tents are known to be 2 to 5 times stronger than competitor tents.

The Gorilla Grow Tent infrared blocking roof insertion, 100% metal interlocking frame and connectors and a convenient access tool pouch.

The doorways offer 360-degree convenient access and can hold up to 300 lbs.!

Its dense threading and tight seals help contain noise and odor, while a sturdy flood pool holds water tightly.

Secret Jardin Grow Tents

Secret Jardin Grow Tents

It doesn’t matter if you’re an expert, professional or a beginner because Secret Jardin offers you grow tents that are easy to use and made using high-professional quality materials that will guarantee a large harvest.

The type of Secret Jardin tent you should get depends on your level of skills since they make kits specifically based on levels of experience. But each one allows users to grow a wide variety of plants at home, easily and conveniently.

Each tent features a canvas outside and reflective nylon on the inside. And they were one of the first brands to use reflective Mylar on the inside of their tents, which has since become an industry standard.

They also offer tents in a wide variety of sizes to fit any space. Many of them also feature viewing holes so that you can check on your plants without having to actually go inside.

But the tent is still super compact and great for small spaces or those with little height. These tents are easy to assemble and feature a solid, waterproof base.

They’re made using strong equipment bars to support carbon filters and reflectors, providing you with at durable inside growing option for your needs.

Eco Farm Grow Tents

Eco Farm grow tents contains 3 styles grow tents, you can find both Gorilla Grow Tents and Secret Jardin Style Grow Tents at Eco Farm.

Eco Farm 10*5FT(120*60*84/96INCH) Grow Tents - GG Style

Eco Farm Extendable Grow Tents, the grow tents feature a adjustable height extension kit that gives you the ability to increase your growing space height from 7′ to 8′ or 9′ tall.

Your plants can grow up to 50% larger. Never again will you have to worry about your plants outgrowing your growing lights and indoor grow room. Now you can experience crouch free maneuvering without banging your head on low hanging lights.

OTHER INDOOR GROW TENTS are limited by a standard 6′ height. Plants often outgrow their space, yields are smaller as a result, and your back and head pay the price as you hunch over in your grow room banging your head against hoods.

Regardless of your grow room location, rest assured Eco Farm has a tent for you!

Eco Farm 10*10FT(120*120) Grow Tents - SJ Style

Eco Farm Standard Grow Tents, the grow tents have multiple sizes, you can choose your favorite one.

Sturdy construction- The grow tent features a 210D/600D/1680D lightproof oxford cloth outside and a highly effective (96%) diamond Mylar inside that enhances the reflective effect. Further, it has large heavy-duty exterior zippers that ensure safety use and easy set-up. The tent is erected on at least 16MM white paint coated metal rods that firmly hold the structure in place. You can also choose the material and size of the connectors by yourself.

Multiple vents- The TopoLite tent has multiple vents that accommodate filters and fans. You can grow fruits, herbs and vegetables in the grow tent. It has rectangular vents that have mesh for better ventilation.

Double stitching – For protction against light leaks, the tent has double stitching.

Manual- The quick tool-free installation with assembly instruction provides a seamless and easy assembly even if you are rookie.

Belts and Floor tray- In the set, you also get 2 nylon belts to use as filter straps and a removable floor tray.

Eco Farm 4*8FT(96*48*72inch) Grow Tents - Roof Style

Eco Farm Roof Style Grow Tents, the grow tents have multiple sizes, you can choose your favorite one.

The Roof Grow Tent is a great solution for those who want to grow in a loft or attic space. The Roof tents are high quality and the slants in the roof mean that this tent will help you take advantage of the space you have. Great product!

The ideal tent for growing in a loft or attic. Helps you to create an ideal grow environment in a loft space or attic with a slanted/pitched ceiling. Tough fabric with 96% reflective lining.

Quality zippers with light-proofing cover flaps used inside and out. Features ventilation panels with bug-screens and velcro attached covers. Hanging rails for hanging fan, filter and light/reflector. Incorporates duct and cable entry points with drawstring fasteners. Removable water-proof fabric drip-tray bottom insert.

Eco Farm 9*4FT(108*48*80inch) 600D Grow Tents - 2-in-1 Lodge

Eco Farm 2 in Lodge Style Grow Tents, the grow tents have multiple sizes, you can choose your favorite one.

Two-tiered- The lodge tent has two stations with 3 separate growing areas allowing you to manage different plants in their various stages of development. This it does while remaining compoact for tiny spaces or areas with limited height.

Durable Build – The tent has a great interior material diamond Mylar lining that enhances the reflective effect for better output. Rectangle vents make use of high density screen that prevents mosquitoes from flying inside.

Different configurations- Depending on your preferences, the tent can be configured various ways which is perfect. The tent offers multiple options for you so you can utilize it maximally.

So which one should you get?

Considering the price and quality, I think Eco Farm Grow Tent is the best choice.

Design a site like this with WordPress.com
Get started